OpenAI Model Deployment
From this instruction, you will learn how to create an Azure OpenAI model GPT-3.5-turbo/GPT-4 and use it in AI DIAL config.
Table of Contents
Prerequisites
- Active Azure account
Step 1: Configuring the AI Model
Request Access to Models
- Login to the MS Azure portal (https://portal.azure.com/) with your credentials. Create an account if you do not have one.
- Navigate to Azure OpenAI and click Create.
- Follow this link in the notification message to request access.
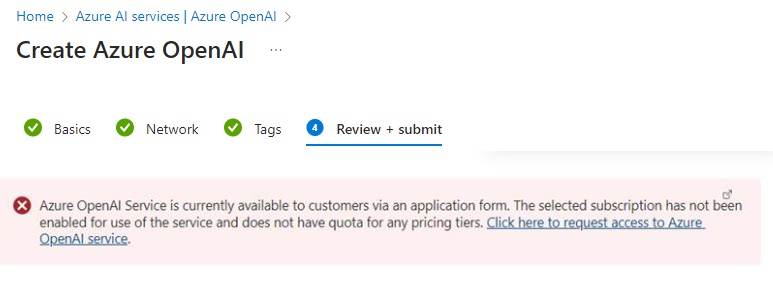
Important: you can proceed with model creation only upon receiving the confirmation email.
Create a Model Deployment
-
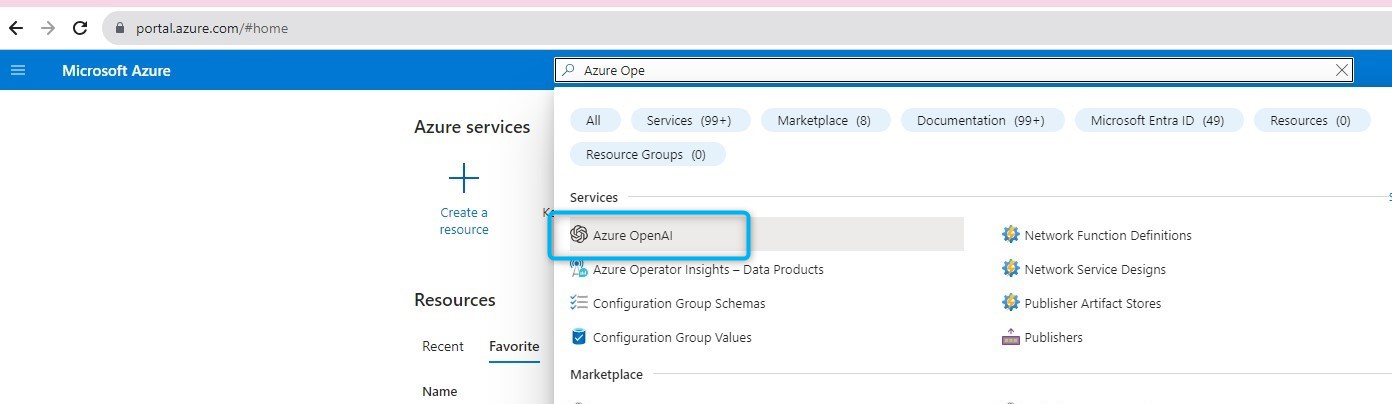
Use the search bar to look up Azure OpenAI and click it to navigate to the Azure AI Services|Azure OpenAI page.
-
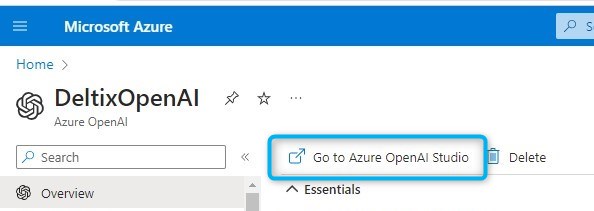
You can now find your OpenAI model in the Azure AI services section. Click it to open and then click Go to Azure OpenAI Studio in the top bar.
-
In Azure OpenAI Studio, click Deployment in the navigation menu and click Create new deployment. Fill in the required fields and click Create to create a model.
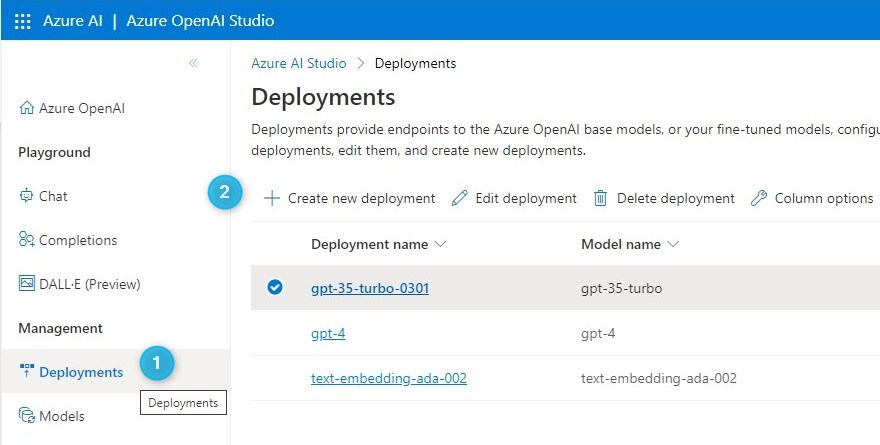
It is important to note that certain models may not be accessible for deployment in a particular region. If you need a particular model, you will have to submit a separate request or relocate Azure OpenAI to a different region.
Step 2: Get Access to AI Model
Configure Azure OpenAI Model and Get API Key
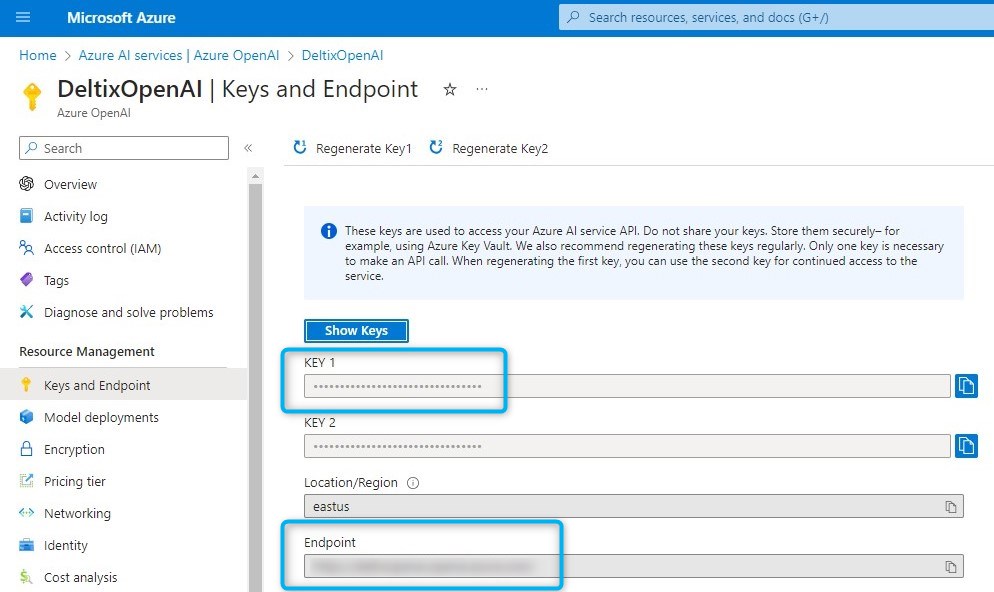
-
Go back to your model page and click Keys and Endpoint. In this section, you can find your key and endpoint that you will need to provide in AI DIAL configuration file.
-
You can restrict access to your accounts based on a specific subset of networks by configuring network rules, only applications that access data through the designated set of networks are permitted to access the account. You can manage default network access rules for Azure AI services resources in Resource Management/Networking.
Refer to Microsoft Documentation to learn more. Refer to Microsoft Data Privacy Policy to learn how data provided by you to the Azure OpenAI service is processed, used, and stored.

Configure Kubernetes Service Account
In case your cluster is located at Azure, the best practice for using Azure OpenAI is to assign an Azure user-assigned managed identity to Kubernetes Service Account. You can do this using Microsoft Entra Workload ID with Azure Kubernetes Service.
Refer to Azure Documentation to learn how to configure Microsoft Entra Workload ID with Azure Kubernetes Service.
Refer to Azure Documentation to learn how to configure a secure access to Azure OpenAI from Azure Kubernetes Service.
Step 3: Add Model to AI DIAL
To deploy a model to AI DIAL, it is necessary to add it to config and configure an adapter for it.
Add Model to AI DIAL Core Config
Add your model with its parameters in the models section.
Refer to AI DIAL Core Configuration to view an example.
Refer to Configure core config to view the configuration of AI DIAL core parameters in the helm-based installation.
Configure AI DIAL Adapter
To work with models, we use applications called Adapters. You can configure OpenAI Adapter via environment variables.
Refer to Adapter for OpenAI to view documentation for a OpenAI AI DIAL Adapter.
Use Adapter with Azure OpenAI API Key
In this scenario, it's enough to enable the adapter. Azure Open AI keys are located in the configuration file of AI DIAL Core. Any other configuration of the adapter is not required.
openai:
  enabled: true
Use Kubernetes Service Account Assigned to Azure user-assigned Managed Identity
Before taking this step, configure Microsoft Entra Workload ID with Azure Kubernetes Service.
In this scenario, the adapter uses Azure user-assigned managed identity. In such a configuration, there's no need to setting the Azure OpenAI API key in the AI DIAL Core configuration file. Authentication takes place on the adapter level.
openai:
  enabled: true

  podLabels:
    azure.workload.identity/use: "true"

serviceAccount:
  create: true
  annotations:
    azure.workload.identity/client-id: "client-id"